


 Tweet
Tweet
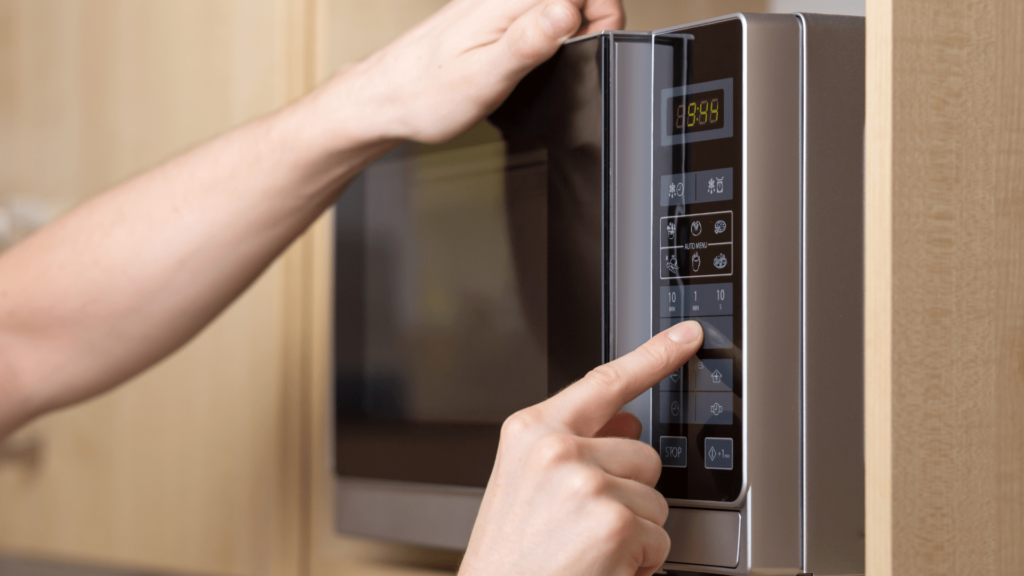
Appliance Tip of the Week...
Why Your Microwave Keeps Tripping The Kitchen Circuit Breaker:
You place the plate of last night’s leftovers in the microwave, close the door, and set the timer for two minutes. Thirty seconds in, half the power to the kitchen goes out. You check your home’s circuit box and see a kitchen circuit breaker has tripped. You reset the breaker, but when you turn the microwave back on, the same circuit breaker trips. Why does the microwave keep tripping the kitchen circuit breaker? It’s likely one of the components inside the microwave has shorted. In this article, we will explain why a microwave component short can trip a circuit breaker and how you can determine which part is causing the problem.
How a microwave component short can trip a circuit breaker
A microwave is a high-voltage appliance which means it draws a lot of power from your home's electrical system. If you try to use other electric-powered kitchen items such as a food processor or mixer on the same circuit as the microwave when the appliance is running, you may draw too much power and trip the circuit breaker. Even when you aren’t using other small appliances on the same circuit as the microwave, a short in one of the microwave’s components will tax the electrical system enough to overload the circuit.
Door switches are the most likely to short
Door switches are the most likely components to short and the easiest to test. However, the microwave’s high voltage system has a number of parts that can short and readily trip a circuit breaker. These include the unit’s capacitor, transformer, and magnetron. Most of these parts can be tested for a short, but you should always practice safety first before you attempt to access the components.
Always practice safety first when testing microwave components
Depending on the microwave model, you can usually access the unit’s door switches by simply uninstalling the control panel. The same is true of many of the microwave’s high-voltage components. However, you will often need to remove the appliance’s entire shroud or cover to access internal parts and this may require fully uninstalling the microwave if it's installed above a range and acts as a venting system for the range's cooktop. Regardless of the microwave model, safety should always come first.
Because of the high voltage and high current used by microwave ovens, the appliance poses a substantial risk for injury or death if precautions are not taken. You should always unplug the microwave before you attempt any disassembly. However, the microwave capacitor has the ability to deliver a dangerous shock.
Discharging the capacitor
Any time any portion of the microwave is disassembled, you should immediately make sure the capacitor is fully discharged, even if you suspect the component has lost its ability to hold an electrical charge. As a safety precaution, most high-voltage capacitors used in recent microwave models have a bleeder resistor in them that should automatically discharge the capacitor after the voltage has been discontinued. That’s a welcome feature, but it’s still recommended you confirm this by attempting to discharge the capacitor manually. How can you do this? Simply place a screwdriver blade or needle-nose pliers across each set of capacitor terminals. The handle of the screwdriver or pliers should be insulated, and you should avoid touching the metal portion of the tool when the tool is in contact with the terminals.
Which microwave parts should be tested for a short?
Once you’ve made sure the capacitor has been discharged, you can begin inspecting specific components for a short.
First, determine if a door switch has shorted
If a microwave keeps tripping a circuit breaker, you should first determine if a door switch has shorted. Most microwaves have three or four door switches that allow the microwave to start or heat once the door is closed. The switches are secured in a door switch holder mounted to the inside of the unit's front panel. You can access the holder by uninstalling the control panel and you can use a multimeter to test each switch for a short. Watch this microwave two-terminal switch testing video and this microwave three-terminal switch testing video to find out how to test these switches for both proper continuity and for shorts.
Test the capacitor for a short
A standard ohm meter can also be used to determine if the capacitor has shorted. Place one meter lead on a terminal and the other lead against the capacitor’s casing, then move the first lead to the other terminal, keeping the second on the casing. Neither terminal should display electrical continuity. If the meter display does indicate electrical continuity, you’ll know the capacitor has shorted and will need to be replaced.
What happens when a high-voltage transformer shorts?
If the door switches and capacitor are functioning normally, your next step is to inspect the microwave's high-voltage transformer and magnetron for a short. When a high-voltage transformer shorts it will usually arc. This can result in visible burn damage as well as a noticeable burning smell. A shorted magnetron, however, will not normally appear damaged, but you can use a multimeter to determine if a short is present.
What happens when a high-voltage transformer shorts?
The hard part is accessing the magnetron for testing; the easy part is testing the component for a short. Here's how you do it:
Video Help If Needed:

Microwave Repair and Maintenance Parts


Related Linksjeff sr.
Why Your Microwave Keeps Tripping The Kitchen Circuit Breaker:
You place the plate of last night’s leftovers in the microwave, close the door, and set the timer for two minutes. Thirty seconds in, half the power to the kitchen goes out. You check your home’s circuit box and see a kitchen circuit breaker has tripped. You reset the breaker, but when you turn the microwave back on, the same circuit breaker trips. Why does the microwave keep tripping the kitchen circuit breaker? It’s likely one of the components inside the microwave has shorted. In this article, we will explain why a microwave component short can trip a circuit breaker and how you can determine which part is causing the problem.
How a microwave component short can trip a circuit breaker
A microwave is a high-voltage appliance which means it draws a lot of power from your home's electrical system. If you try to use other electric-powered kitchen items such as a food processor or mixer on the same circuit as the microwave when the appliance is running, you may draw too much power and trip the circuit breaker. Even when you aren’t using other small appliances on the same circuit as the microwave, a short in one of the microwave’s components will tax the electrical system enough to overload the circuit.
Door switches are the most likely to short
Door switches are the most likely components to short and the easiest to test. However, the microwave’s high voltage system has a number of parts that can short and readily trip a circuit breaker. These include the unit’s capacitor, transformer, and magnetron. Most of these parts can be tested for a short, but you should always practice safety first before you attempt to access the components.
Always practice safety first when testing microwave components
Depending on the microwave model, you can usually access the unit’s door switches by simply uninstalling the control panel. The same is true of many of the microwave’s high-voltage components. However, you will often need to remove the appliance’s entire shroud or cover to access internal parts and this may require fully uninstalling the microwave if it's installed above a range and acts as a venting system for the range's cooktop. Regardless of the microwave model, safety should always come first.
Because of the high voltage and high current used by microwave ovens, the appliance poses a substantial risk for injury or death if precautions are not taken. You should always unplug the microwave before you attempt any disassembly. However, the microwave capacitor has the ability to deliver a dangerous shock.
Discharging the capacitor
Any time any portion of the microwave is disassembled, you should immediately make sure the capacitor is fully discharged, even if you suspect the component has lost its ability to hold an electrical charge. As a safety precaution, most high-voltage capacitors used in recent microwave models have a bleeder resistor in them that should automatically discharge the capacitor after the voltage has been discontinued. That’s a welcome feature, but it’s still recommended you confirm this by attempting to discharge the capacitor manually. How can you do this? Simply place a screwdriver blade or needle-nose pliers across each set of capacitor terminals. The handle of the screwdriver or pliers should be insulated, and you should avoid touching the metal portion of the tool when the tool is in contact with the terminals.
Which microwave parts should be tested for a short?
Once you’ve made sure the capacitor has been discharged, you can begin inspecting specific components for a short.
First, determine if a door switch has shorted
If a microwave keeps tripping a circuit breaker, you should first determine if a door switch has shorted. Most microwaves have three or four door switches that allow the microwave to start or heat once the door is closed. The switches are secured in a door switch holder mounted to the inside of the unit's front panel. You can access the holder by uninstalling the control panel and you can use a multimeter to test each switch for a short. Watch this microwave two-terminal switch testing video and this microwave three-terminal switch testing video to find out how to test these switches for both proper continuity and for shorts.
Test the capacitor for a short
A standard ohm meter can also be used to determine if the capacitor has shorted. Place one meter lead on a terminal and the other lead against the capacitor’s casing, then move the first lead to the other terminal, keeping the second on the casing. Neither terminal should display electrical continuity. If the meter display does indicate electrical continuity, you’ll know the capacitor has shorted and will need to be replaced.
What happens when a high-voltage transformer shorts?
If the door switches and capacitor are functioning normally, your next step is to inspect the microwave's high-voltage transformer and magnetron for a short. When a high-voltage transformer shorts it will usually arc. This can result in visible burn damage as well as a noticeable burning smell. A shorted magnetron, however, will not normally appear damaged, but you can use a multimeter to determine if a short is present.
What happens when a high-voltage transformer shorts?
The hard part is accessing the magnetron for testing; the easy part is testing the component for a short. Here's how you do it:
- With the microwave's power cord unplugged and the capacitor fully discharged, disconnect the wires from the magnetron's terminals.
- Rotate the multimeter's range selection dial to the lowest setting for ohms of resistance.
- Contact the meter leads to the magnetron terminals to confirm there is electrical continuity.
- Now move one of the meter leads to the magnetron's casing, keeping the second lead on a terminal.
- Confirm the meter display no longer shows electrical continuity is present.
- Move the second lead to the other terminal, keeping the first lead on the casing.
- Observe the meter display. If either terminal shows electrical continuity between the terminal and the casing, the magnetron has shorted and will need to be replaced with a new one.
Video Help If Needed:
Microwave Repair and Maintenance Parts
Related Linksjeff sr.